Site Administrator's Guide: Editing Content
Depending on what templates your site theme provides, you will encounter a number of different form field types whilst managing content in Wheelhouse CMS. The current available field types include free-form content, single-line text content, images as well as repeatable combinations of these.
Free-form content: Free-form content is the most common type of content field you will see, allowing you to create HTML content using the Wheelhouse editor. See the section below for information on how to get the most out of the Wheelhouse editor.
Single-line text content: This is the simplest type of content, allowing you to enter a single line of unformatted text. This is commonly used for small pieces of text such as section titles or link URLs.

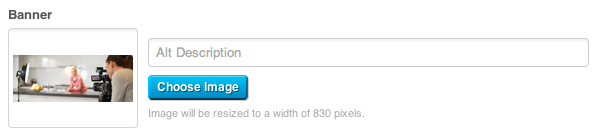
Images: The image selector allows you to set an image, that may or may not be resized depending on the template. The image selector also lets you customize the Alt attribute used by the image tag.
Some templates may also define repeatable combinations of the above field types. In such cases, you can use the Add Item button to add additional items, remove items using the trash icon, and reorder items by dragging the grey bar on the left of each item.
See the Theme Developer's Guide for information on how to provide each of these fields within your templates.
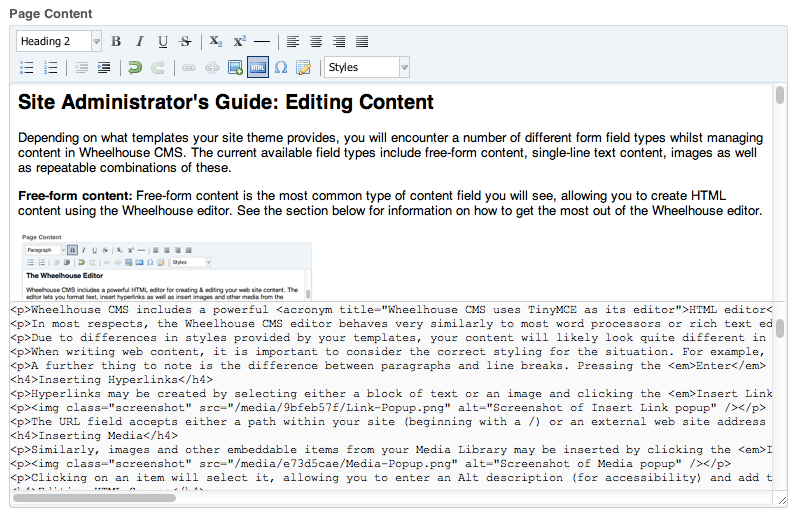
The Wheelhouse Editor
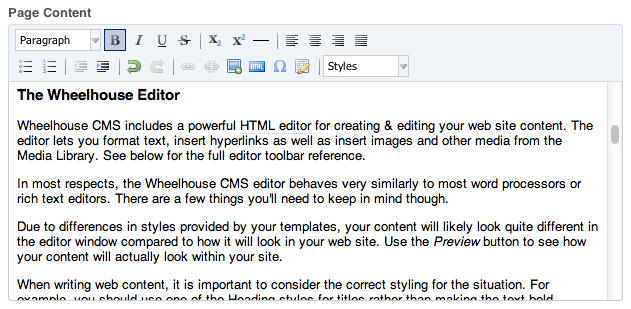
Wheelhouse CMS includes a powerful HTML editor for creating & editing your web site content. The editor lets you format text, insert hyperlinks as well as insert images and other media from the Media Library. See below for the full editor toolbar reference.
In most respects, the Wheelhouse CMS editor behaves very similarly to most word processors or rich text editors. There are a few things you'll need to keep in mind though.
Due to differences in styles provided by your templates, your content will likely look quite different in the editor window compared to how it will look in your web site. Use the Preview button to see how your content will actually look within your site.
When writing web content, it is important to consider the correct styling for the situation. For example, you should use one of the Heading styles for titles rather than making the text bold. Similarly lists should be created using the Ordered List  or Unordered List
  icons rather than manually inserting numbers or hyphens as bullets.
A further thing to note is the difference between paragraphs and line breaks. Pressing the Enter key will insert a new paragraph whereas Shift+Enter will insert a line break. You will generally want to stick to paragraphs unless the situation specifically requires a line break. When pasting content, Wheelhouse will in most cases convert multiple line breaks into new paragraphs, but you may want to double-check.
Inserting Hyperlinks
Hyperlinks may be created by selecting either a block of text or an image and clicking the Insert Link icon  . This will open up the Link popup shown below.
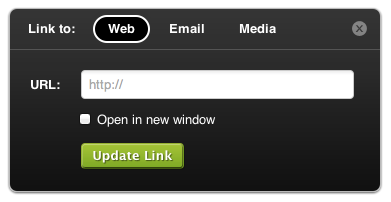
The URL field accepts either a path within your site (beginning with a /) or an external web site address (http:// will be added automatically if not provided). You can also select whether or not to open the link in a new browser window. Using the tabs within the popup, you can also create email (mailto:) links or links to items within your Media Library.
Inserting Media
Similarly, images and other embeddable items from your Media Library may be inserted by clicking the Insert Media icon  , which opens the Media popup shown below.
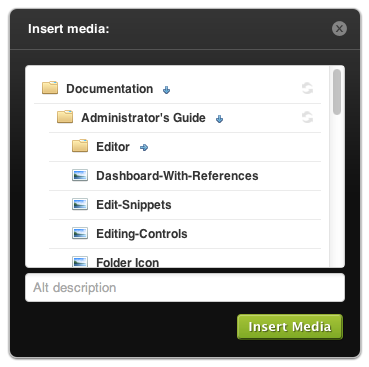
Clicking on an item will select it, allowing you to enter an Alt description (for accessibility) and add the media to your content with the Insert Media button. This popup will only show those items from your Media Library that may be embedded within a web page, so PDFs and other such files will not be listed.
Editing HTML Source
The content you create within an editor window is converted to HTML for rendering on your web site. To see the HTML code that is generated, click the View Source icon  . The source code will be displayed underneath the editor window, and any changes will be updated in both views.
Editor Toolbar Reference

 |
Change the current block type, e.g. Paragraph, Heading 1-6, etc. |
 |
Bolds the selected text. |
 |
Italicizes the selected text. |
 |
Underlines the selected text. |
 |
Strikethroughs the selected text. |
 |
Makes the selected text a subscript, e.g. X2. |
 |
Makes the selected text a superscript, e.g. X2. |
 |
Inserts a horizontal rule. |
 |
Left-aligns the current block/paragraph/heading. |
 |
Center-aligns the current block/paragraph/heading. |
 |
Right-aligns the current block/paragraph/heading. |
 |
Justifies the current block/paragraph/heading. |
|
Inserts an unordered (bulleted) list. |
|
Inserts an ordered (numbered) list. |
 |
Decrease the current indentation level (unindent). |
 |
Increase the current indentation level (indent). |
 |
Undo the last action performed. |
 |
Redo the last action that was undone. |
|
Opens the Insert Link popup allowing you to create a hyperlink to another page in your site, another web site, an email address or to a file in your Media Library. |
 |
Removes any hyperlinks within the current selection. |
|
Opens the Insert Media popup allowing you to insert images, videos and other embedded media from your Media Library. |
|
Allows you to view and edit the HTML source code directly. |
 |
Opens the Insert Symbol popup allowing you to insert special characters, e.g. ©, €, ½. |
 |
Opens the Insert Table popup allowing you to add tablular data. |
 |
Allows you to use any custom styles defined in the current theme's admin stylesheet (admin.css). See the Theme Developer's Guide for more information. |